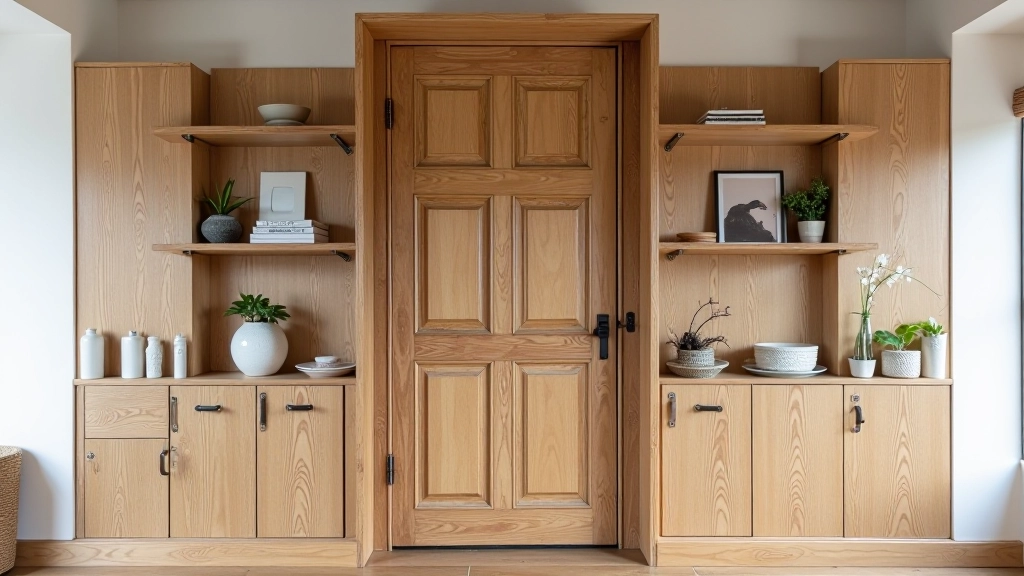
Upcycling Old Doors Into Statement Shelving
Transform salvaged wooden doors into stunning wall-mounted shelves. We'll walk you through simple hardware installation and finishing options that'll make your Sai Ying Pun loft look intentional and polished.
Why Old Doors Make Perfect Shelving
Here's the thing — old wooden doors are basically already built for this. They're solid, they're got real wood grain, and they're way more interesting than standard shelving boards. Plus, you'll pay a fraction of what custom shelves cost.
Most doors you'll find measure around 32 inches wide by 80 inches tall, but they cut down easily. The beauty is in their imperfections — paint drips, hardware marks, uneven stain. All of that becomes character once they're mounted on your wall. We've installed over 200 door shelving projects across Hong Kong lofts, and the results never disappoint. Vintage doors bring warmth that feels genuine, not forced.
3-4
Hours Installation Time
$40-80
Hardware Per Door
200+
Projects Completed
20-30 lbs
Typical Weight Capacity
01
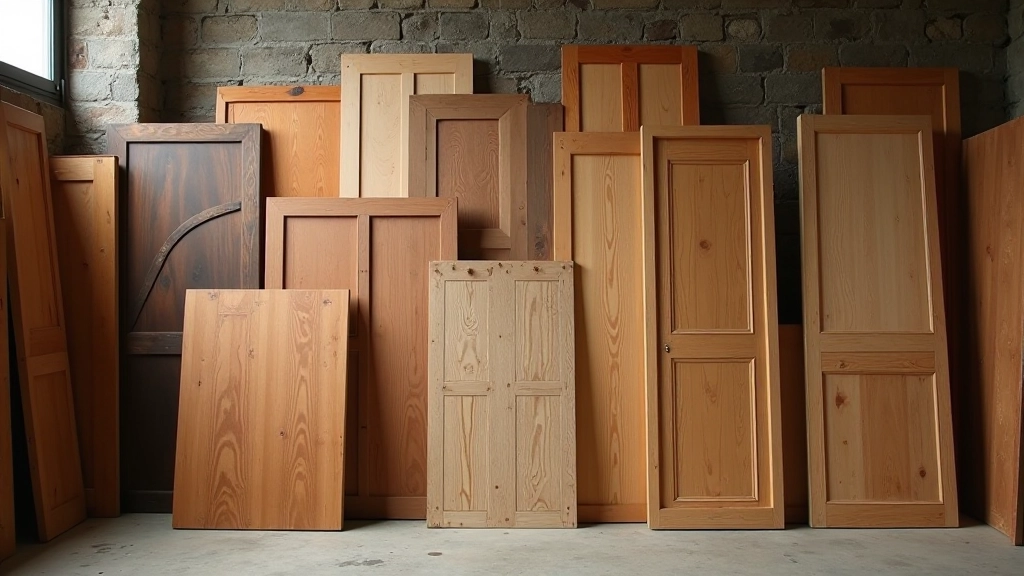
Finding & Sourcing Your Door
Your hunt starts in three places: local salvage yards, estate sales, and Facebook Marketplace. Honestly, Facebook is your quickest bet — just search "wooden door" in your area and you'll find dozens of options within days.
Look for solid wood doors, not hollow ones. Tap the door with your knuckles — solid wood sounds dense and heavy, while hollow cores sound empty. You want doors that are at least 1.5 inches thick. The grain should appeal to you as-is because you'll want to keep that authentic look. Avoid doors with deep water damage or rot (soft wood that crumbles when you press it). Some cosmetic wear is perfect.
Expect to pay $20-60 per door depending on age and wood quality. Older hardwood doors from the 1960s-80s are your sweet spot — they're plentiful and structurally solid. A good salvage yard owner can tell you the door's history within seconds of looking at it.
02
Cutting & Preparing Your Shelves
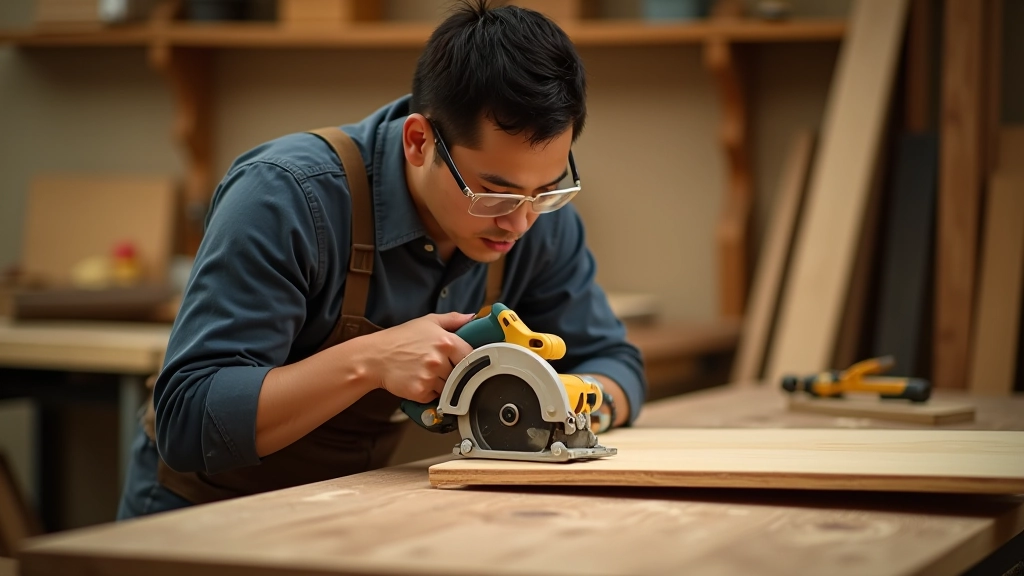
Most doors are too tall for shelving, so you'll cut them down. Standard door height is 80 inches — we typically cut shelves to 24-36 inches wide and 12-18 inches tall. Smaller shelves look cleaner and won't sag under weight. You'll need a circular saw or handsaw for this. If you don't own one, your local hardware store usually offers cutting services for $5-15 per cut.
After cutting, sand the edges smooth with 120-grit sandpaper. This takes about 30 minutes per shelf. Don't over-sand — you want to keep that authentic weathered look on the face. Just smooth out the cut edges so they won't splinter.
Now comes the finish decision. You've got three options: leave it as-is (we call this "raw vintage"), refresh the existing finish with wood conditioner, or apply a new stain or paint. Raw vintage works best in industrial lofts. For softer interiors, a coat of matte finish or soft grey paint transforms the piece. Most projects take one coat and dry overnight.
A Note on Safety & Load Capacity
This guide is educational and based on standard installation practices. Always verify that your wall structure can support shelves — use a stud finder and install into wall studs when possible. Weight capacity depends entirely on your hardware and wall type. Solid wood doors typically support 20-30 pounds per shelf when properly mounted. If you're uncertain about your wall or structural capability, consult a local carpenter or handyperson before installation. Improper installation can result in shelf collapse and property damage.
03
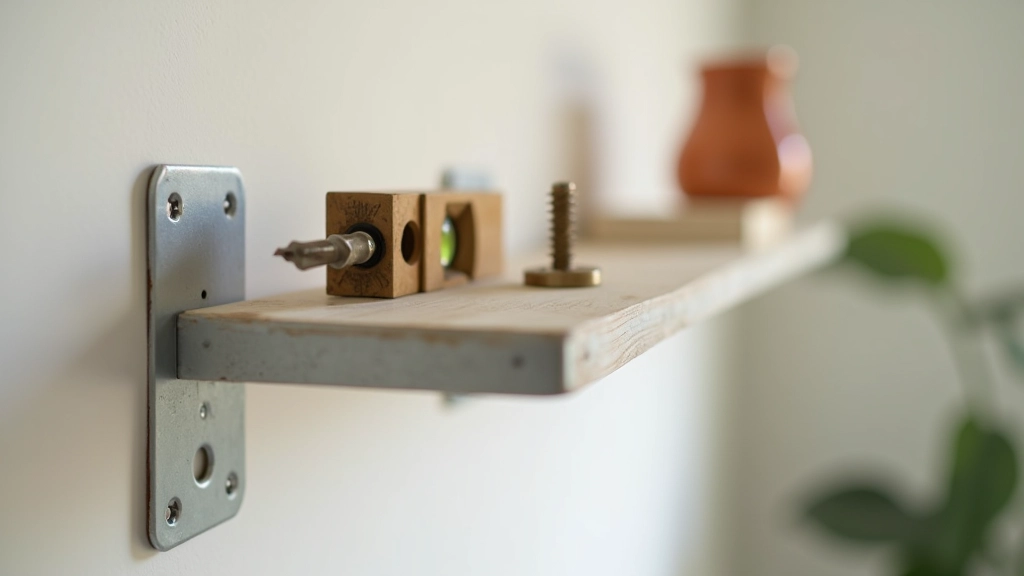
Hardware Installation That Actually Works
Here's where precision matters. You'll need heavy-duty floating shelf brackets — at least 8 inches deep, rated for 25-35 pounds each. Install two brackets per shelf, positioned 6-8 inches from each end. Don't skimp on brackets. We've seen cheap hardware fail, and it's not worth the risk.
Use a level to mark bracket placement. Measure from the floor up to where you want your first shelf. Mark the height with a pencil line. Locate your wall studs with a stud finder — studs are 16 inches apart. Mark stud locations with blue painter's tape. Your brackets should mount into studs whenever possible. If your design doesn't allow for stud placement, use heavy-duty drywall anchors rated for 50+ pounds.
Drill pilot holes first — this prevents splitting. Then screw in 3-inch wood screws. The door will hang on these brackets. Slide your prepared door onto the brackets and secure it with screws from underneath (through the bracket into the door). This keeps the hardware invisible from above.
04
Styling Your New Shelves
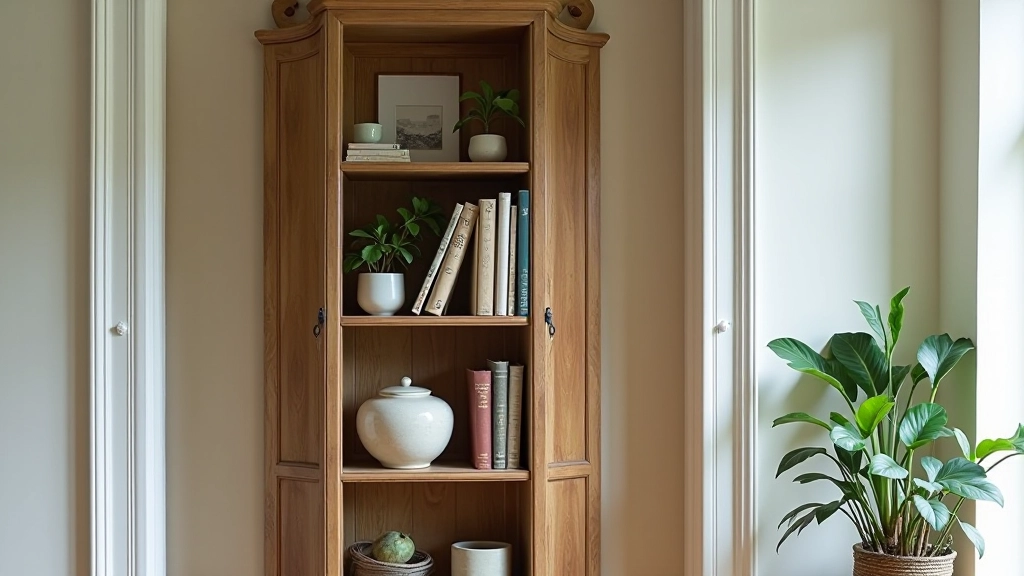
The real magic happens here. Treat your new shelves like you'd style a bookshelf. Mix heights — stack books horizontally with a few standing upright. Add greenery (real or high-quality faux). Include one or two statement pieces that reflect your personality. A ceramic vessel, a framed photo, a vintage find from your local market. The goal is balanced but not symmetrical.
In Sai Ying Pun lofts, we've found that door shelves work best when you play up the industrial bones of the space. Keep styling minimal on weathered doors — let the wood speak. On freshly finished doors, you can be bolder with accessories. The shelf's colour should complement your wall. If walls are white, grey, or natural concrete, almost any door finish works. If walls are darker, lighter wood tones stand out better.
Leave some breathing room. Overcrowded shelves look cluttered, not curated. Aim for the shelf to be about 60% styled and 40% empty space. You'll be surprised how much better it looks, and you'll have room to rotate pieces seasonally.
Making It Your Own
Door shelving isn't just practical — it's a statement. It says you care about where things come from and you're not afraid to do things differently. Your Sai Ying Pun loft deserves pieces with history, not mass-produced shelving from a big box store.
The entire project takes an afternoon if you're cutting the doors yourself, or just a few hours if they arrive pre-cut. Installation is straightforward once you locate your studs. The result is a one-of-a-kind feature that'll last decades and actually get better-looking as it ages.
Start with one door. See how it feels in your space. You'll probably want to add more. Most people do.